HGUC Sinanju
May 13, 2012 at 16:17 | Posted in 1/144 scale, Model kits | 3 CommentsTags: anime, Gundam decals, HGUC, Sinanju, water slide decals, weathering
Introduction
I excitedly bought this kit when volume 2 of Unicorn Gundam OVA aired, and as volume 5 looms, I was finally able to complete it. After watching the Sinanju in action in the OVA, I was very motivated when I started out with this kit. As I started building, I noticed that for a HGUC kit, it sure has a lot of parts. Then I began to ponder about possible color schemes and how to deal with the gold and black parts on the chest, wrist & knees. Before long my motivation started to dwindle. I cut out all the parts from the runners and bundled them somewhere in the corner of my room and has been in that state for months. It was only when I did some spring cleaning recently that I decided to finally complete it.
Materials & methods
As I mentioned previously, there’s a lot of parts in this kit. The parts that need seam line removal are the head, forearms, thighs, rifle and the white boosters at the back. There are some spiky parts on the shoulders and front skirt armor, and I decided to make it even pointy and sharp by adding some epoxy putty extensions. In the end I got lazy and only applied it to the front skirt armor. There’s also the small yellow vents on the shoulder armor that needs to be painted, so I just covered it up with putty to save me the trouble of masking and stuff. I also ‘shaved’ the head antenna to make it thinner. Unfortunately, as I was finishing this kit, i realized some parts were missing; 2 pipe-like things on the forearm. It must have gotten lost or misplaced somewhere and I never did manage to find it.
As for painting, I initially didn’t plan to paint the red parts, but since I used putty I guess I had no choice but to paint it.. I primed the parts using black surfacer and then spayed Mr Color Spray “Red Madder” since I kinda liked the red color. For the chest, knees, neck and wrist collar, I sprayed Tamiya gold evenly and then hand painted the black using Tamiya enamel paint. It works well since the enamel paint seeps between the small crevices and later it was easy to wipe off any smudges.
For the decals, I used the full set of Bandai’s water-slide decals for the HGUC SInanju. The problem was, neither the kit manual nor the decal sheet provided any clues about decal placement. So I searched the web for the manual of the MG version that had such information and used that as a reference. I spent a whole day just for the decals and it was my first time to finish using a complete sheet of water-slide decals.
To finish it off, I applied some paint chipping effects using Tamiya silver (maybe I should make a tutorial for that). And finally I sprayed flat top coat to finish. However, the spraying was uneven since the spray can content was about to finish. Hence some parts received a huge glob of flat top coat while others less so.
Results


Discussion
For a kit in which many things didn’t went exactly a planned, I’m just glad I was able to finish it. Not my best effort by any means but by virtue of it being a Sinanju, it already looks good on my shelf. As with other kits from the Unicorn series, it’s relatively huge. And the design of the head does not resemble anything from the gundam universe, it’s more like something from Guyver. The articulation is rather expected from a HGUC kit, i.e mediocre but the legs do bend past 90 degrees, which is a plus. The gold & black sleeves look cool, but they limit hand movement when holding the various beam weapons.
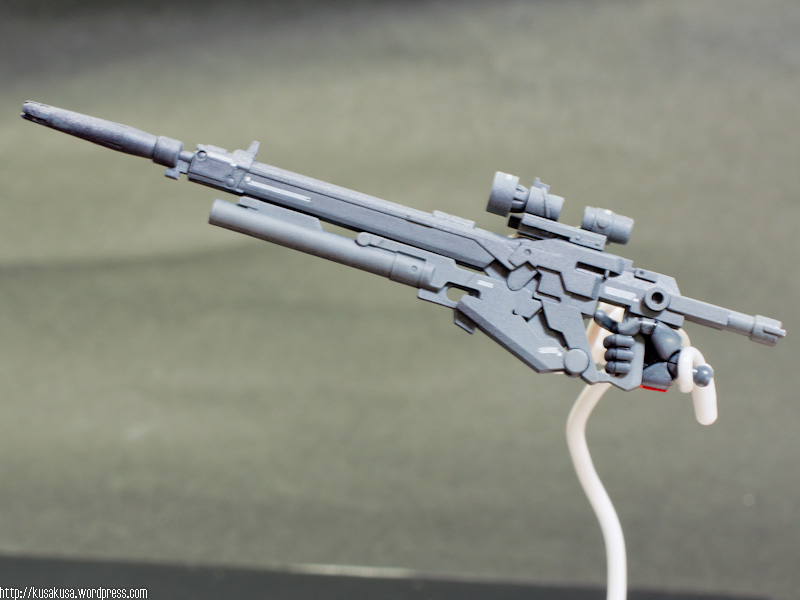
Speaking of which, the kit included a variety of melee beam weapons: 2 sabres, 4 axes. Add to that the beam rifle with grenade launcher attachment. It would have been nice if the bazooka which was a separate add-on for the MG version was also made available for the HGUC kit but as far as weapons go, this kit is already fully loaded.
To conclude, it’s neither my best nor enjoyable builds (for a variety of reasons) and in the end, I’m just glad to finish it. Definitely required some work to complete and make it look good. So if you’re looking for a kit that will take up plenty of your time, then this kit is for you.
3 Comments »
RSS feed for comments on this post.
Leave a comment
Modelers-G

Create a free website or blog at WordPress.com.
Entries and comments feeds.

Nice!!!! Damn nice, Sinanju is one of the best designed red MS for me. =3 nice work really nice work! Too bad you lost some of the parts?
Comment by darkandchoco— May 13, 2012 #
thanks! yeah it’s too bad i lost some parts. a lesson for me to be more organized
Comment by kusakusa— May 14, 2012 #
Looks nice. The Sinanju is indeed a beauty. I still have to build mine but I’m planning on using the reverse wash technique for the gold trim. My only problem is getting enamel paints here :\ …
Comment by Ravhin— May 22, 2012 #