How to do weathering using enamel wash
January 31, 2013 at 18:25 | Posted in How-to | 8 CommentsTags: enamel, How-to, wash method, weathering
The enamel wash method will give your gunpla a dirty & weathered look while simultaneously filling the panel lines. What you will need is: enamel paint & thinner, paint brush, kitchen towel or cotton-bud. Please note that the images below are not mine. I scanned them from Dengeki Hobby magazine. So here’s what you do:
1. Choose your color & thin your paint
When choosing a color, the main point is contrast. When the model kit is painted with light colors (white, cream etc.), I tend to use darker colors for the wash (e.g. dark brown); and for kits painted in darker colors, I use lighter colors for the wash (eg. yellow-brown). Next you would want to thin the enamel paint to a consistency similar to when applying panel lines.
2. ‘Wash’ your model with enamel paint
For this, you need a wide brush since you’re going to cover the entire surface of your kit with the thinned enamel paint. Doing this also fills up the panel lines.After applying the enamel paint, leave the parts for a minute or so for the paint to partially dry.
<Tip: I prefer to apply the enamel paint on each part separately, instead of on the assembled part like in the picture. This is because I had experience of the plastic parts becoming brittle and subsequently cracked after I applied the wash method on assembled parts.>
3. Wipe off the enamel paint
After the enamel paint is relatively dry, take a cotton bud and dip it in enamel thinner. Then use the cotton bud to wipe off the enamel paint. The key point here is to NOT wipe everything cleanly. You’re supposed to leave some traces and smearing of the enamel paint to give that dirty & weathered look.
The wiping direction when using the cotton bud is also important. You have to take into account the position of a particular part when the kit is fully assembled. A sideways smearing pattern looks less natural on a standing Zaku’s leg, for example. That’s why the wiping direction is facing downwards in the photo above.
You can also use a kitchen towel soaked with enamel thinner and dab on the surface to get some kind of pattern, like in the picture above.
And that’s all there is to it! You can see the effect of this method when you compare the ‘unwashed’ part (left), with the ‘washed’ part (right). The one in the middle shows how it looks like right after step 2.
Here’s just some of my own examples:
GM Wagtail
September 17, 2011 at 02:42 | Posted in 1/144 scale | 2 CommentsTags: camouflage, dengeki hobby, GM, GM type C, GM Wagtail, HGUC, Kotobukiya, MSG weapons, wash method, weathering
Introduction
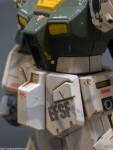
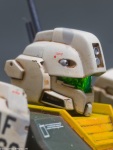
The GM Wagtail conversion parts were a ‘free’ addition with the May 2011 edition of Dengeki Hobby magazine. All the parts are molded in white and you need a HGUC GM Type C kit to build it. The conversion parts essentially involve the head, shoulders, hips, backpack, forearms and lower legs. Also provided are a beam rifle and a half-shield.
Materials & Methods
Seam lines that needed to be fixed are at the forearms, lower legs, shoulders and beam rifle. I was a bit lazy & messy with seam line removal and some scratch marks still can be seen. No modifications were made to the body, but I modified the beam rifle a bit. I cut off the end of the barrel and the round scope/sensor thingy and replaced them with some spare parts from Kotobukiya’s M.S.G Weapon Unit 16 (Shotgun). I also decided to give it the naginata from the M.S.G Weapon Unit 9 (Sniper rifle).
Painting is a must for this kit, if not it’ll look horrible with different parts in white, cream & dark blue colors. I went for a Safari-esque color scheme. The chest,shield & feet were painted dark green & for the rest of the body I did a camouflage pattern using grey & sand color spray cans. I did the same for the weapons. Masking was done using Tamiya tape or blue tack. Finally I applied an enamel wash with dark brown + yellow paints before applying the decals & some light weathering effects.
Results
Discussion
Overall, it was quite a lot more work than I expected, especially with the masking. Plus I had to wait out for the rainy days (thanks to Typhoon No. 12) to pass by before I could paint. My only gripe with this kit is that the legs do look a bit short. Also, although several types of hands were provided, none of them were for holding a weapon on the left hand. Maybe Bandai doesn’t like lefties. Now that I’m done with this, I dunno whether I should continue with my long-abandoned Sinanju or start with my RG Zaku (White Ogre project). Hmmm…choices, choices, choices…
Mass Production Gelgoog Ver2.0
August 2, 2008 at 22:23 | Posted in Master Grade | 3 CommentsTags: battle damage, gelgoog, gelgoog ver2.0, Master Grade, military decals, minelayer, Tamiya enamel, wash method, weathering
I’ve noticed that I’ve been lacking Zeon monoeye units in my collection. Well this is the first step to fix that problem. My initial idea for this kit was not to paint it, but to apply some weathering and battle damage effects. I did however sprayed the inner frame with Mr Color Dark Grey spray can. I painted some details on the inner frame using Tamiya enamels and used wash method using flat black enamel for the panel lines. So here’s some pics of the inner frame first:
It was a real shame that I had to cover the inner frame with the armor. So much of the details like the ass and leg thrusters would be obscured from view. Even the eye slit was so narrow that you can hardly see the monoeye. Anyway, I decided to make a rough surface on the knees, foot and shield to add some weathered feel to the kit. The method can be found on the How-To section.
After putting on the last piece of external armor, I proceeded to giving it a full-body wash using a mix of flat brown and flat black enamels to give both panel-lining and weathering effects. Then I added battle damage using my penknife (I’m too cheap to buy another hobby knife). I used some pics from Dengeki Hobby magazine as reference on where to place the damage effects. Nothing major, mostly scratches and bullet damage. Then I painted chrome silver onto the damaged parts followed by a little bit of black to add some sense of depth to the damage.
The next step was my favourite, adding decals. The dry-transfer decals that came with the kit were not impressive, especially the huge words ‘Principality of Zeon’ for the shield. I only used a few of them and the rest I used water-slide decals I got from the Shizuoka Hobby Show. I added minor scratches to the decals to further simulate damage. And to top it off, I sprayed with flat Topcoat.
Overall, the design and details in this kit is awesome. Now comes the bad points. Too many parts in the inner frame adds a lot of weight to this kit, which in turn makes the joints loose very easily. The legs are particularly heavy, and the polycap joints in the groin can’t hold the weight when posing with lifted legs. Second, I was dissapointed it didn’t come with a backpack like previous Gelgoog MGs. Nevertheless, it was a fun build and worth my yen.
EDIT(8/19) – Added new pics with the minelayer backpack and bazooka I got from Toys R Us
Blog at WordPress.com.
Entries and comments feeds.


