Sign of the Zeta
November 28, 2012 at 12:19 | Posted in Random rants | Leave a commentTags: Gundam Ace, Head Display Base, Real Grade, RG Zeta, Zeta Gundam
It has been a while since my last random rant. This time it’s about the Zeta gundam. Unlike previous RG releases, there was a bit more fanfare with the release of the RG Zeta. Probably because it’s the 10th release of the RG line (if you count the Titans & AEUG Mk-II as separate releases).
I decided to buy one since I haven’t really built a proper Zeta kit yet. I did buy the MG Zeta 2.0 a long time ago but I sold it to recover some badly needed funds at the time. The RG Zeta cost 2500 yen at Yodobashi camera, slightly pricier than the standard RG kit; but it’s a fully transformable kit, which may have driven the price up a bit.
And inside the box, there’s an extra booklet which basically shows the concepts and history of the RG line. Here’s the front cover:

I also bought myself a copy of Gundam Ace manga (January 2013 issue) which comes with a 1/48 scale Zeta head display base. It’s looks to be a perfect complement for the RG Zeta. It’s molded in white, so painting is a must. Speaking of painting, I already have a custom color scheme in mind for my RG Zeta.

And for the next (February) issue of Gundam Ace (not actually released in February, but around the end of December), they’ll include a set of decals for the Zeta head, based on this pamphlet included in the RG Zeta kit:

If you look at the top-left corner, you can use the decals for 2 color schemes: standard red-white-blue-yellow and the white Zeta (Amuro’s custom). Although not mentioned specifically, it looks to be the standard peel-and-stick decals. Oh well, I’ll just stick to my water-slide decals. So here ends my Zeta rant and I’m looking forward to building it.
RG White Ogre Zaku
July 5, 2012 at 10:47 | Posted in 1/144 scale | 7 CommentsTags: ホワイトオーガー, Char's Zaku, Real Grade, RG, weathering, White Ogre Zaku, zaku II
Introduction
What I like about the Zaku is the many color variations and one of my favorites is the White Ogre. The idea of custom painting my RG Zaku in white has been in my head for a while but the final element which makes a White Ogre Zaku has eluded me. I’m talking about the lizard decal on the right shoulder armor of the Zaku. Yes, it may be a small thing, but one that differentiates the White Ogre from just another Zaku with a white paintjob. When I found someone selling 1/144 scale White Ogre decals on Yahoo Auctions, I was finally able to go ahead with the project.
Materials and methods
The Zaku used was the RG Char’s Zaku II. I could have used the RG MS-06F Zaku but I was saving that for another project. If you’re a stickler for details, you may argue that the White Ogre was a ground type Zaku, hence no leg thrusters like the one on Char’s Zaku. I could have covered those leg thrusters but I didn’t. So basically this means that there’s no modifications to the kit other than the color scheme.
Since the kit was originally in various shades of salmon pink and maroon, I sprayed a layer of black surfacer on all parts except the inner frame, which was sprayed with Tamiya Gunmetal. For the power cable parts, I removed them from the runner and onto a toothpick for easier painting. For all the armor parts, I sprayed multiple layers of Mr. Color flat white to get the desired shade of white.
Another main feature of the White Ogre Zaku is the weathering, and for that I first applied the wash method using brown + yellow Tamiya enamels. This simulates the dirt/rust kind of weathering effect. Next, to simulate paint scratch damage effects, I used a toothpick (the pointy end) dipped in grey enamel paint and “drew” the paint scratches on the parts painted white. I repeated the same method using silver paint for the black parts (chest, knees and elbows). The placement of these paint scratches are important, so I used images of a weathered MG White Ogre Zaku for reference.
After all the paints have dried, I applied the water-slide decals. I used copious amounts of Mr Mark Setter to make sure the decals stick and to prevent silvering. I also scratched the decals a little bit using my hobby blade to have a consistent battle damaged look. As a final weathering step, I applied sand-colored weathering pastels (Tamiya), mostly on the foot and as always, I finished off with a layer of flat topcoat.
Results


Discussion
This is the second RG kit that I built, after the RG Strike. The weapons that come with the kit are the standard machine gun, bazooka and a heat hawk; the rest that you see are from System Weapons 002. Building the kit was a breeze, despite the many small parts and the same can be said for the painting process. As expected from an RG kit, the joints have great movement but it still can’t match the MG Zaku 2.0 in that respect.
Most of the problems I had with this kit was during photography. Every time I tried to make some action poses, the front skirt armors tend to come off. During the many times I popped them back in, I accidentally snapped them in half. Fortunately it was easily remedied using some plastic cement.
Admittedly, applying the White Ogre color scheme on a RG Zaku was hardly a novel idea, but I think I managed to execute it quite well, particularly the weathering. Overall, it was fairly smooth sailing and an enjoyable build. Now that I have a clearer idea of the RG Zaku anatomy, hopefully modifying the next one for a future project wouldn’t be too much of a nightmare.
RG Launcher Strike Gundam
March 21, 2012 at 20:01 | Posted in 1/144 scale | 1 CommentTags: Grand Slam, Hobby Japan, Launcher Strike Gundam, Real Grade, RG Strike Gundam, Sword Strike Gundam
Introduction
Okay, so I didn’t really build a new RG Strike. I just attached the Launcher Strike pack from the FG 1/144 kit to my existing RG Aile Strike Gundam. I got the idea from a Hobby Show and some pics from a hobby magazine. This was before Bandai released the RG Skygrasper with Launcher and Sword packs.
After finishing building my RG Strike, I actually lost interest in the project and went on to finish 3 other HGUC kits. Then just recently Hobby Japan released some goodies with its April issue. This included a 1/144 scale Grand Slam sword, previously only available with the PG Strike. That finally spurred me on to finish my Launcher/Sword Strike project.
Materials & Methods
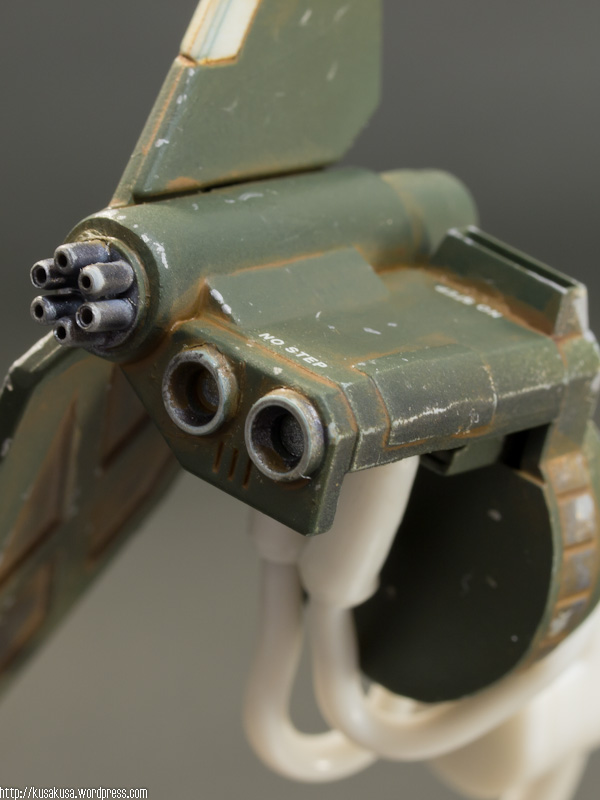
The Launcher pack consists of 3 parts: the launcher cannon, backpack and shoulder-mounted weapon pod.
The weapon pod can be attached to the right shoulder of the RG Strike with no modifications but its a bit loose. I added some extra details using pla-plate and various M.S.G parts:


The backpack requires some modification: round peg (backpack) won’t fit a square hole (Strike). So I cut off the round peg from the launcher backpack and constructed a square peg from pla-plate to fit the Strike body. The square peg is then attached to the backpack using Tamiya epoxy putty. Looks ugly from the inside, but it won’t be visible anyways so I don’t care. I also attached a cylindrical tank to the right side of the backpack.

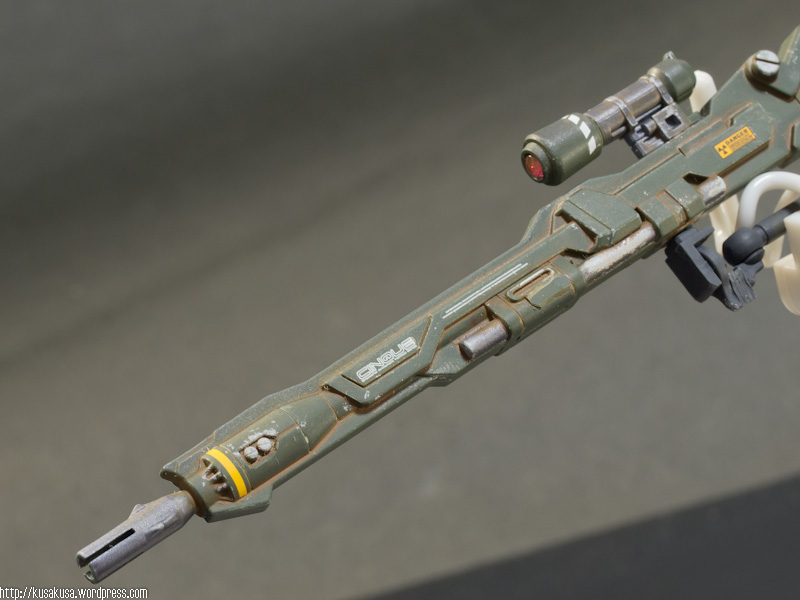
For the launcher cannon, I shifted the position of the left-hand grip backwards a little bit so that the cannon would extend out a little bit more, making it look longer. The right-hand grip was replaced with the gattling gun grip from System Weapons 001. I covered the resulting holes and gaps with some pla-plate and putty. I also removed the square sensor on top of the cannon and replaced it with a round sensor/scope from System Weapons 002.

The Grand Slam sword was assembled as it is. I only removed some bit of plastic at the tip to make it pointy and sharp. That’s it for structural modifications.
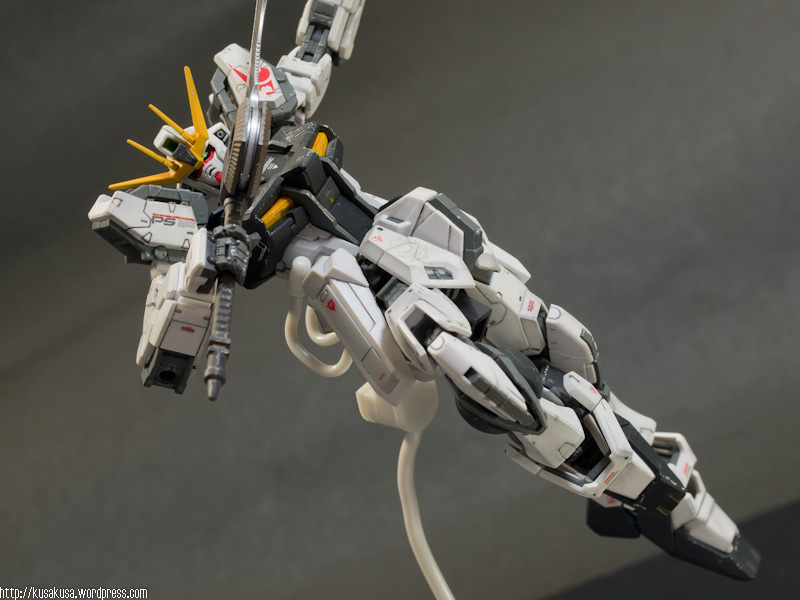
For painting, I used German Gray for the backpack and dark green for the cannon and shoulder weapon pod. Then I applied some panel lines using dark brown + yellow enamel paints and some silver dry-brushing and paint chipping effects. After applying some decals I finally finished it off with a layer of flat topcoat.
Results


Discussion
For a relatively “simple” project, I actually am quite pleased with the end product. I actually spent some time imagining (mostly daydreaming during meetings) and thinking of ways to improve the overall look of the launcher weapon set, and to successfully transfer ideas to tangible results was really satisfying. Okay, enough with the self praise. I hope the materials & methods section would be useful to those of you who would like to modify your own FG Launcher Strike kit instead of buying the RG Skygrasper set.
Modelers-G

Blog at WordPress.com.
Entries and comments feeds.
